Downside: You can't just press the Yubikey button and have the code generated as you would expect, but this can be alleviated with a keyboard shortcut.
Sources:
- Use a YubiKey as a MFA device to replace Google Authenticator
- Faster AWS/PayPal/TOTP two factor auth with Yubikey
- Install the Yubikey CLI
- Insert the Yubikey
- Show a list of configured TOTP accounts
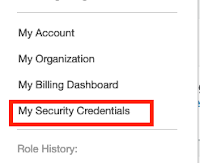
- Log in to AWS Management Console as usual, pop up the menu by clicking on your user name and select My Security Credentials.
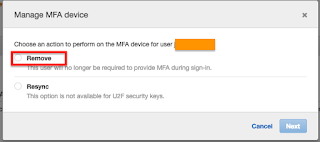
- Push the "Manage MFA Device" button.

- Select Remove to disable MFA, and then re-start the procedure to activate MFA again.
- Configure MFA for your service.
- Then, this will get you a 6 digit code.
- Start Automator, and create a new Quick Action.
- Search for applescript.
- Drag and drop "Run applescript" to the right hand side, select "Workflow receives no input", and type the following code.
- Then File | Save, and go to System Preferences | Keyboard | Shortcuts | Services to assign a shortcut to your new service.
- Now, simply log in the AWS Management Console with your password, and when the site asks for the MFA, use the programmed shortcut, which will automatically generate the 6 digit code and grant you access.
brew install ykman[jerome@jeroboam] > ykman oath list
[jerome@jeroboam] > 

[jerome@jeroboam] > ykman oath add 'Amazon Web Services:toto@org-prod' [jerome@jeroboam] > ykman oath code --single 'Amazon Web Services:toto@org-prod'but macOS Mojave, Automator “Not authorized to send Apple events to System Events.” gave the solution:
I quote:
System Preferences > Security & Privacy > Accessibility > Click Automator and TADA it works.End quote


